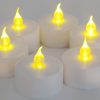
DIY Magnetic Tea Light Snowmen
Decorating for the holidays can either be really fun or super stressful! If you have a small amount of time to get things done, it can be easy to find yourself running around like a chicken with its head cut off. On the flip side, if you have a family that is very eager, then it may seem like the holidays can’t come soon enough. To help those in both of these categories we’ve put together a simple DIY snowman that will help those with little time, as well as those with spare time!
Supplies:
- Set of 3/8"x 1/16" Disc - Neodymium Rare Earth Magnet
- Set of 1/2" x 1/8" Disc - Plastic Coated - White - Neodymium Rare Earth Magnet
- Battery Powered Tea Light
- Black Sharpie
- Pipe Cleaners
- Craft Small Pom Poms
- Black and Red Felt/Paper
- Ribbon
- Glue
- Scissors
- Start your 3/8"x 1/16” magnets and glue them to the back of your battery powered tea lights. Ensure that you don’t cover up the screw or an accessible way to get back into the tea light to change the battery. Let the glue dry before proceeding.
- Using your sharpie, create the coal eyes and mouth of your snowman.
- Next you’ll design a hat or earmuffs for your snowman:
- Hat - Cut out a slim and thick rectangle double the length of your tea light. Glue them perpendicularly to each other on top of the snowman’s head. Add your own flair with glitter or a red cut out stripe if you’d like!
- Earmuffs - Glue a pom pom on each side of the snowman, right where you think his ear would be. Then cut your pipe cleaner to the length of the distance between the pom poms and glue in between.
- To finish off your snowman, create a scarf. Cut a ribbon to fit around the tea light as a scarf would fit you, and glue appropriately.
- Now you’re ready for the fridge! Take your white plastic coated neodymium magnets to create the body, and top it off with your light up snowman head!

