How to Build a Magnetic Murphy Desk

In a small house or apartment, space can be tight. If you’ve lived in a small home, you’ve probably come up with a few tricks of your own to amplify the space that you have. One idea to help save space is to build a Murphy desk. You may have heard the term “murphy” used when referring to the bed━the Murphy bed, named for its patented inventor, William Lawrence Murphy. The bed folds up to fit into a vertical wall, and this DIY follows the same concept. You can fold the desk up when you’re not using it and pull it out when you need it.
Supplies
- Shelving unit
- Flat piece of wood
- Wooden frame
- Nails/ screws
- Drill
- Hinges
- Magnetic latch
- Neodymium magnets
- Chalkboard/ chalkboard paint
Steps
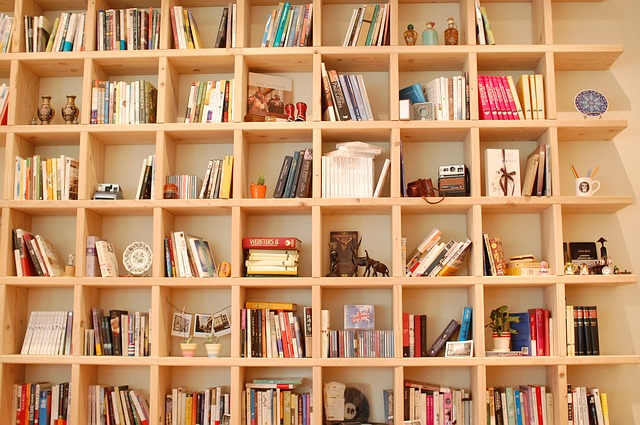
- Instead of starting completely from scratch, you can start with a sturdy, open shelving unit. If you have one that is a decent size and don’t mind ‘upcycling’ it a bit, then it could be a good starting point. You could use a bookcase like this one:
[caption id="attachment_1024" align="alignnone" width="300"]
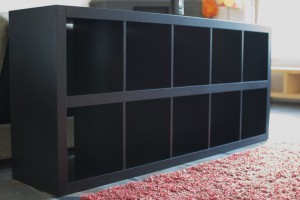 Photo by Lauren Bosak[/caption]
 - Or you can also use a built in bookcase or shelving unit like the one below to serve as the starting model for your folding desk.

- Now that you have shelves to start from, it is time to take some measurements. No matter which shelf you use, it must be elevated from the floor. If it is built in and runs from the floor to the ceiling, you can still use it. However, you will have to leave a few of the lower shelves exposed.
- Measure the width and length dimensions of the shelves that you want to cover.
- Use those measurements to model the piece of wood that will serve as your desktop. The desk should be at least 3 feet or more from the ground, that way you will have a place to put your legs when it is unfolded. It should also be able to fit into the shelf perfectly.
- Now that you have the wooden piece that will serve as the shelf door and the desktop, you will need to make a slot for the piece to fit in. To do this you can create a wooden frame on the inside of the shelf. The frame should match the depth of the wooden piece and should be about ½ inch wide. Nail the frame into the shelf.
- If you would like to use the underside of the desk as a chalkboard when it is folded, do this step before step 8: Paint the underside of the desk with 2 or more layers of chalkboard paint. Then wait for it to dry for at least 2 to 3 hours.
- Screw hinges into the bottom most shelf, connecting the desk piece to the shelf. For extra security, install some magnetic latches or another latching device to the top shelf to secure the desk when not in use.