DIY Game Boy Fridge Magnet
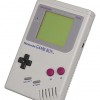
If you grew up in the ‘90s, this DIY magnet project will certainly inspire some nostalgic feelings for you. Launching in 1989, the hand-held gaming console, Game Boy, wasn’t the first to be released, but changed how the world would view them over the next 25 years. To bring back all those great feelings you had playing your Game Boy on the school bus, we’re going to transform your refrigerator into one. You won’t be able to play any actual games, but it will be great for keeping track of grocery lists, to-do lists, and provide a place to quickly write notes down. Before we get started, you’re going to need to get some materials to complete the project.
Supplies:
- 2 sets of adhesive backed neodymium rare earth magnets
- Small chalk board 16” x 12”
- 1 Natural HDPE sheet 24” x 47”
- 1 Red HDPE sheet 24” x 47”
- 1 Black HDPE sheet 24” x 47”
- Pair of scissors
- Ruler
- Silver/white sharpie
- Glue
Directions:
- Cut the Natural HDPE sheet to a rectangle measuring 26” x 18”. This will be used as the background of the Game Boy’s screen. Keep the remaining scraps as they will be used to create the start and select buttons.
- With the the remaining Natural HDPE, cut 2 rectangles measuring 7” x 1.5” for the start/select buttons.
- Using the scissors, round off each of corners of the rectangles created.
- Cut 2 red circles measuring 7” in diameter, and one circle measuring 1” in diameter. The larger circles will be used for the A and B button, while the smaller one will be used for the battery light.
- Glue the 1” red circle to your 26” x 18” rectangle half way up and 2.5” from the left side.
- To create the directional pad of the Game Boy, trace two 9” x 3” intersecting, perpendicular rectangles to create the up, down, left and right buttons. Once traced, cut out the figure, with rectangles remaining intersecting. (Shape Example)
- Using the adhesive backed neodymium rare earth magnets, remove the protective paper and attach a magnet to each side of the directional pad. Attach one magnet on each of the four corners of the screen backing, one to each side of your select/start rectangles, and one for each of the 7” circles.
- Using the remaining magnets attach them to the back of the chalk board, with at least one magnet per corner.
- Now you are set to create your own refrigerator Game Boy. First, stick the screen backing on, then in the center overlay the chalkboard to create the full screen. Below the screen, add your directional pad, two circle buttons and below those the start/select rectangles.