DIY Magnetic Christmas Advent Calendar
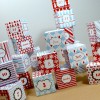
Count down the days until Christmas with a fun DIY magnetic advent calendar! You can create an advent calendar with some simple everyday items and choose the presents to use inside. Plus, when you make one yourself you can customize it to fit your decor and interests like this person did with their Doctor Who inspired Tardis calendar. To create your own easy and festive advent calendar follow these instructions.
Supplies
- Small gift boxes or tins
- Wrapping paper (optional)
- Printable numbers
- Glue
- Tape
- Neodymium magnets
- 25 small gifts of your choice
Steps
- If you have gift boxes that are designed with holiday patterns, then you can skip to step 2. However, if you have old tins or plain boxes, make them a little more festive by wrapping the box and lid with some wrapping paper.
- Cut out printable numbers from 1 to 25. If you aren’t starting from December 1, that is okay. You can simply start from the number of the corresponding date and go up to 25.
- Glue the cutout numbers to the lid of the wrapped box or tin.
- Place a gift in each box. To ensure that they stay in place you can tape them to the bottom of the box.
- Place the lid on the box or tin, turn it over so the bottom is face up and then glue a small magnet to it. Press firmly so that it stays in place but not hard enough that it collapses the box.
- Place your boxes in order on your fridge or other magnetic surface. You can also put them in a triangle shape so that it mimics the look of a tree.

