DIY Magnetic Cork Planters
You can never have enough fridge magnets. Not only do they make great reminders and organizational tools, but they can also brighten up your kitchen by adding a little personality to your fridge. If you’re an avid recycler and plant-lover, you can make your fridge reflect your interests with this easy DIY for magnetic cork planters.
Here’s what you need to get started:
Supplies:
- Corks (one per plant)
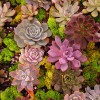
- Small plants
- Neodymium disc magnets (1-2 per cork)
- Strong glue
- Small knife such as a kitchen paring knife or pocket knife
Directions:
- After collecting all of your supplies, use the knife to dig a small hole in the corks. You might need a screwdriver to start the hole and then use the knife to widen it enough for a small plant. The hole should go about halfway down the cork.
- Using really strong glue, attach the neodymium disc magnets to one side of the cork. Depending on the size of the cork, you may two small magnets.
- Once the glue has dried, fill the holes of your cork planters with soil.
- Last, plant your clippings into your new magnetic planters.