How to Make Harry Potter Bottle Cap Magnets
Recycling is always a good way to dispose of glass bottles. But these DIY bottle cap magnets are a fun alternative to tossing bottle caps into the recycling bin! The first step is to pick the fandom of your choice. We chose Harry Potter, but to each his (or her) own. Follow the steps below and you will have a fun new decoration for your fridge or anywhere you please!
Here are all of the supplies you’ll need to get started on this project:
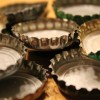
- Bottle caps
- Photo paper
- Scissors
- Epoxy
- Plastic cup
- Popsicle stick
- Hot glue gun
- Small disc magnets
- After you’ve picked your fandom for this project, the next step is to go online and pick the images you want to use. For our Harry Potter set, we had a nice mix of characters, quotes, and forehead scars. When you’re done, print them out on your photo paper so that the images are sharp and clear. Make sure you print them to be 7/8 inch circles.
- Next, cut out your images so they will fit inside of the bottle caps and place them inside.
- After, fill a plastic cup with epoxy and pour it into the bottle caps. If the images start to float, use the popsicle stick to push them to the bottom. Also use the stick to pop any bubbles that appear. Don’t use glue instead of epoxy for this step. The glue with seep through and ruin your image.
- Once the epoxy is dry, use your hot glue gun to attach your small disc magnets to the back of the bottle caps. When it’s dry and secure, your project is ready for display!