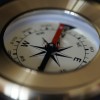
How To Make Your Own Compass
Compasses have been around for centuries, but the earliest findings date back to China during the Qin dynasty (221-206 BC.) The first compass used for travel was also used by a Chinese man named Zheng He, who used it for navigating the oceans from 1405 to 1435.
Today, you can find compasses anywhere from the dollar store to your smartphone. In order to demonstrate how compasses work, you can make your own compass using simple household materials that you probably already have lying around the house. Your homemade compass could also come in handy if you ever find yourself lost in the woods on a hiking trip with no power to your cell phone and no other way to escape!
Supplies:
- Sewing needle
- Magnet (with a north/south distinction)
- Wax paper
- Scissors
- Red marker
- Bowl
- Water
Directions:
- First, you will magnetize one end of the needle. In order to do this, you will need to rub the north end of the magnet against the sharp end of the needle. Rub the needle at least 50 times to ensure it is fully magnetized.
- Take the red marker and color the north end as well for directional use later.
- Now rub the opposite end of the needle 50 times with the south end of your magnet.
- Using your scissors, cut a circle about 1 inch (2.5cm) in diameter out of the wax paper.
- Take the circled paper and thread the needle as you would a cloth, making sure that it is only half-way through on both sides. Ensure that the needle is also laying flat on the paper for best balance.
- Fill your bowl with water.
- With the needle on top of the wax paper, float the two on top of the surface of the water.
- Watch as the needle rotates on top of the water until the north end, colored red, moves to face north.

