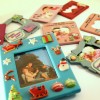
How To Turn Holiday Photos Into Magnets
Oftentimes, the holiday season is also the picture-taking season. While you and your loved ones are together, you’re probably taking more than a few photos. Now, the holiday season is coming to an end, but you can capture and keep all the holiday memories with some photo magnets or magnetic picture frames. Find out how to make your own with this guide.
Photo magnets
Supplies
- 2x2 tiles
- X-acto knife
- Holiday pictures
- Mod Podge
- Neodymium magnets
- Strong glue
Steps
- Cut your holiday photos to fit the tile size. You can get bigger tiles if you have larger photos. You can also cut the size to fit like a polaroid picture by leaving a white border on all sides.
- Once your photos are cut to size, glue them to the tiles with Mod Podge. Let dry and put another layer of Mod Podge on them.
- When the layer has dried attach the neodymium magnets to the back with a strong adhesive.
Magnetic Picture Frames
Supplies
- Felt frames and holiday themed pieces
- Glue
- Magnets
- X-acto knife or scissors
Steps
- Take your felt holiday pieces and glue them to the picture frame to create your own theme. You can use Christmas, New Year’s, Hanukkah, or any other holiday symbols, and you can find sets of these at craft stores.
- Make sure your holiday pictures will fit within the picture frame. If they do not fit, you can resize them or cut them down to size with an X-acto knife or scissors.
- Glue magnets to the back of the felt frame.
- Place the picture in the frame and place it on the fridge. You can stick a small piece of tape to the photo and frame to make sure the photo stays in place.

