Using Heat Shrink Tubing With Magnet Projects
Several DIY projects involve gluing magnets onto other objects in order to magnetize them for organizational purposes. But for some DIY projects, glue or tape might not be the right type of adhesives for the job. Glue can be messy and tape may not last long for objects that aren’t stationary. So, if you need a more permanent and less messy solution for DIY magnet projects, try using heat shrink tubing.
Heat shrink tubing sounds like a difficult thing to use but in reality, it’s very simple. It’s just shrinkable plastic tubing usually used to insulate wires. The material is also useful when securing magnets to various objects. Before you use heat shrink tubing, make sure you buy the right size and follow proper safety guidelines when dealing with a heat agent.
Supplies:
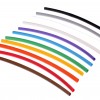
- Heat shrink tubing
- Neodymium disc magnets
- Scissors
- Heat source
- Object you want to magnetize
Directions:
- The size of heat shrink tubing depends on what you want to magnetize. The bigger the object the larger diameter of tubing you should buy. Remember the tube will shrink once heated so it’s diameter will change. You should keep this in mind so you buy a larger diameter than the object you are attaching the magnet to.
- Now, place the tubing around the object you want to magnetize. For example, if you’re attaching a magnet to a pen, slide the inside the tubing and position it to where you’d like to put the magnet.
- Next, insert the magnet into the tube as well. The shrinkable plastic should be wide enough to hold the object and magnet in place together.
- To secure the magnet to the object, carefully heat the plastic with the heat agent. The tubing will contract and hold the magnet in place.
- Finally, cut off the excess tubing with your scissors.