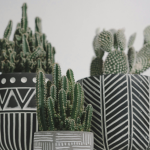
DIY Cactus Magnets
This next DIY is for our friends who struggle to keep anything green alive and typically revert to fake plants. If you are one of these green thumb challenged hopefuls, this craft was made for you! Join in the fun and spruce up your home or gift these clay creations to a friend with a bit of time and imagination!
* Adult supervision is required for this DIY when children are present.
Pick up your supplies:
- White, light and dark green, and pink clay
- Cactus-shaped cookie cutter
- Acrylic roller
- Hot glue
- Baking paper
- Pizza cutter or craft knife
- Disc magnets (we recommend 12mm x 3mm disc magnets)
Follow These Instructions:
- Start by rolling a medium-sized ball of white clay out to approximately 3 mm thick and use your pizza cutter or craft knife to cut one side of your clay in a straight line.
- Repeat the process in step one with your light green clay and connect the straight edges of the white and green clay, overlapping the pieces slightly.
- Next, use your rolling pin to flatten the clay and connect the two colors.
- Place your cactus cookie cutter over your clay, perfectly lining up the pot of your cactus with the white clay.
- Take a small section of your pink clay and roll it back and forth in your hands to form a long spiral shape. (This will serve as the flower for your cactus).
- Repeat this process with your dark green clay, making a significant amount of “piping” spiral shapes to outline your cactus or cacti.
- Begin outlining your cacti with the dark green piping, adding additional “lines” throughout the center of your cactus to mimic the real thing.
- Once completed, roll your pink piping into a circle to create your very own flower for the top of your cactus.
- Pre-heat your oven to 130 degrees Fahrenheit.
- After you have finished decorating, place your cacti on parchment/baking paper and bake for 15 minutes.
- Leave the cacti to dry fully for at least half an hour.
- Next, place a small dab of hot glue on your disc magnet and secure one to the back of each cactus. Repeat this process for as many cacti as you made.
- Let the glue dry and your magnets are ready to grace your home with some botanical elegance you do not have to remember to water!
Unlock Your Creative Side With Apex Magnets
In the world of magnets, you do not need to possess an innate sense of craftiness or be famous for your home DIY projects. You just need imagination and a bit of help from Apex Magents! Check out our weekly blog for the latest news, DIYs, organization solutions, and much more, with step-by-step instructions that walk you through each detail. If you need additional help, our magnetic masters are always ready to answer your questions with solutions that bring your project to life!
Why wait to get started? Visit our online store to pick up your supplies in no time with complementary same-day shipping on all orders placed before 3 PM EST. Do not forget to show us your finished projects on our Facebook page!