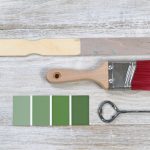
DIY Paint Stick Picture Frames
Loved our magnet craft of DIY paint sticks that we posted last month? Well, we’re taking that craft one step farther with DIY paint stick picture frames! Make sure you pull up our previous post, as you’ll be following the same steps for decorating the sticks in this DIY -- you’ll just have to add a few extra steps.
Themes to consider:
- Use maps to create a travel frame
- Use alphabet stickers for a “1st day of school” frame
- Use dried flowers or save the dates for a wedding frame
- Use birth announcements for a new baby frame
Additional Things That You’ll Need:
- Wood glue
Steps:
- First, cut paint sticks to the desired frame size width.
- Then, line up the cut paint sticks next to one another until you reach the desired frame size length.
- Use wood glue to connect each stick together and let dry.
- Follow the DIY Magnetic Paint Sticks tutorial to decorate the sticks.
- Glue or tape a photo or two onto the finished paint stick frame.
- Let dry and apply 2-4 10mm x 1mm or 12mm x 2mm disc magnets to the back of each frame.

