Get in the Game with These DIY Golf Ball Magnets
With spring right around the corner, you may be looking for the perfect Father’s Day gift to get your dad or that special someone in your life. Make a hole in one every time with these creatively simple golf ball magnets to proudly display on their fridge, workshop, or even on their golf bag! You can even take this DIY to the next level by asking for that game-winning ball or their favorite brand to truly make this gift one from the heart. Fore… it is time to tee off with Apex Magnets!
Gather Your Supplies and Set Up Your Tee Shot
Here is what you’ll need:
- 2”x4”x2’ wood block (any type of wood will work)
- "1" x 1/8" inch disc magnets
- CA glue
- Accelerant
- Drill press
- Circular saw
- Clamps
- Pen or pencil
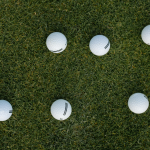
- Golf balls of choice
- Sandpaper
- Bandsaw
- Quick square measuring tool
- Sharp punch
- Forstner bits 1 11/16“ & 1”
Instructions:
- Begin by marking your 2”x4”x2’ block with a pen or pencil at 6” from one end and another at 3” on that same end.
- Draw a centerline on the wide face of your block using your square measuring tool
- At your 3” mark from the end, punch a hole in the crosshairs of your two lines.
- Next, measure 8” from the other end of the 2”x4”x2’ block; mark it as you did the other end.
- Use a bandsaw to cut your wood at the 6” marking, separating the wood into one short and one long block.
- Spritz your longboard at your 8” marking with the accelerator, then dab half of your small block with CA glue.
- Carefully line up the end of your small block to meet the 8” mark on your longboard, holding tightly until secured.
- To ensure your board remains secured, you may even want to add two screws to the edges of the glued end of your short board.
- Using your 1 11/16” Forstner bit, set it the exact height of the long block and line up your bit overtop your punched hole marker.
- Clamp your board to your drill press table; drill your hole.
- Next, switch out your setup to a 1” bit; modify your depth stop to ¾” deeper.
- Mark a small reference point slightly above your freshly drilled hole prior to cutting again (note this is a reference point and does not need to be exact).
- Place a fence/scrap board against your board flush with the drill press and use your circular saw to cut through until you cut through your original piece of wood.
- You are now ready to begin making your magnetic golf balls with this handy dandy mold that will give you perfect drill every time.
- Return to your drill press and using your 1” bit, lower your drill back into the same hole you just finished drilling and lock your quill.
- Reclamp your board accordingly.
- Your mold is now perfectly positioned to begin drilling your golf balls of choice
- Placing your golf ball in the mold, show face down, bring the quill down and lock it tightly into position.
- For extra securement, use a squeeze clamp.
- Drill your ball to approximately ⅛”,
- Take your 1 x ⅛” disc magnets and rough one side up slightly with sandpaper to help your glue adhere to the magnets.
- Prime with the accelerator then place a small amount of CA glue on your magnet and press it to your ball.
- Let it dry; admire your work.
Your Next Project Awaits with Apex
Give the gift that is on par with what that friend or family member loves! From unique gifts to tips and tricks for making the most of small spaces, Apex has it all on our blog for your next DIY. Share your finished product or tell us what else you have been working on at our Facebook page! And remember, magnet experts are never far away, contact us today at 1-304-257-1193.