DIY Magnetic Cheese Board
It’s likely that you’ve never thought to purchase a magnetic cheese board, but Apex Magnets is here to tell you why this is a must-have item when hosting a happy hour, birthday party, or any other celebration at your home.
There are a few different types of magnetic cheese boards — some have magnets in the base of the board, while others use magnets or a magnetic strip on a wedge of wood attached to the board — but the purpose is the same: to hold your cheese knives. This way, you aren’t prone to losing a utensil from your set or having any accidentally fall to the floor while people are grabbing their hor oeuvres.
You can purchase magnetic cheese boards, but we thought it would be more fun to share a DIY magnetic cheese board project so you can show off your woodworking skills at your next event! If you found a non-magnetic cheese board you love and want to make it magnetic, follow steps 3 and 4 under the instructions!
Supplies:
- Close-grained wood, such as birch, cherry, maple, or yellow poplar, between 1 ¼ to 2 inches thick and free of blemishes or knots
- Clamps
- Orbital sander
- Jigsaw
- Drill
- 4 ½” x ⅛” disc magnets
- Epoxy resin
- Microfiber cloth
- Food-safe finish, such as mineral oil
- Draw the intended shape of your cheese board out on the piece of wood. Cheese boards vary in size and shape, but the standard rectangular cheese board is 9”x13”. You could also opt to make a round cheese board or, if you’re feeling adventurous, a unique and unconventional shape.
- Clamp the piece of wood to a stable work surface and use your jigsaw to cut out the shape.
- Once you’ve gotten your shape where you want it, designate which side of the board you’ll use as the bottom. Using a drill, drill four holes in a row, about one inch in from one of the sides and at least a quarter inch in between. Don’t drill the holes all of the way through — leave about a quarter inch of wood between the hole and the top of the cheese board. If the hole is shallow, it should be deep enough that the magnet is flush with the wood surface to ensure it sits nice and flat on any surface.
- Adjust the amount of holes you drill based on the amount of cheese knives/serving utensils you have to accommodate the board.
- Using epoxy resin, glue one ½” x ⅛” disc magnet in each hole. Allow time for the epoxy to dry. We recommend this placement of the magnets so that the handles of your cheese knives hang off the side of the cheese board, and the blade lays flat against the board to align with the magnet.
- Once the epoxy has dried, sand the surface to remove any rough patches and sharp edges. We recommend a low-grit sandpaper at first and then a higher grit sandpaper to smooth out the board.
- Using a damp microfiber cloth, wipe any dust off your board and work surface.
- After all of the debris has been removed, seal your cheese board with a food-safe finish as instructed on the package.
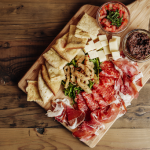
- Break out the cheese, meats, pickled vegetables, and fresh and dried fruits, and enjoy your newest creation your friends and family are sure to love.