How to Make DIY Magnetic Plant Holders

If you have a green thumb and are itching to start gardening before the warm temperatures arrive, look no further than indoor DIY magnetic planters! Using a few simple items you can pick up at your local hardware or craft store, fill your home with beautiful botanical elegance with a short hands-on session, plus drying time for the concrete. Plus, with the ability to customize your planters' size, color, and shape, you can tailor your creations to match your home’s aesthetic.
Safety note: Neodymium magnets are not toys and are intended for adults 18 and older. Any project that uses neodymium magnets should be done only under the direct supervision of an adult, and the magnets should be kept away from young children and pets. If two or more magnets, or a magnet and a metal object, are swallowed, they can pull together through the intestinal walls and cause serious injury. Get emergency medical care right away if you suspect a magnet has been swallowed.
Gather Your Supplies and Get Started
Enjoy the beauty of springtime any time with this simple DIY the entire family will love. And remember to take pictures along the way to share with us on our Facebook page! Here is what you’ll need:- "1" x 1/8" inch disc magnets
- Ready mix concrete
- Cylinder silicone molds (select your preferred size)
- Eggs
- Soil
- Hot glue gun
- Piping bag
- Craft paint/dye (optional)
- Small paint brushes or pens
- Various types of small plants (succulents are an ideal choice)
Instructions:
- Begin by placing a small dab of hot glue on your "1" x 1/8" inch disc magnets, securing them to the side of each silicone mold, using one per mold.
- Prepare your ready cement and place it in your piping bag, cutting a hole at the end (if not pre-cut).
- Fill each mold with a small amount of cement, being careful not to overfill the molds. Your magnet should be entirely covered.
- Take an egg and press it firmly in the center of each mold, leaving the egg behind each time, so every mold contains an egg.
- Allow your cement pots to dry fully before removing them from the mold.
- Crack the egg in each mold, leaving behind a small amount of the egg to serve as a slow-release source of calcium for your plants.
- Decorate your pots with paint, markers, glitter, etc., for a bit of extra fun (optional).
- Scoop a small amount of dirt in each pot and place your plant firmly into the dirt, packing any loose dirt around your plant.
- Place your new magnetic plant holders around your home, like on the fridge, a whiteboard, a magnetic paint wall, or just about anywhere else!
Spring Came Early At Apex
Are you ready to ditch the winter blues for spring sunshine? Fill your home with greenery, organize and decorate your porch, or get your RV prepped for that first road trip with a little help from your trusted magnet masters at Apex! No job is too big or too small, we have what you need for them all, with same-day shipping for orders placed before 3 PM ET. Discover our massive selection, and remember to check out our blog for more project ideas that will keep you creating all summer long! Give us a call today at 1-304-257-1193 and get your questions answered fast!
Related Products
-
1 x 1/8 Inch Neodymium Disc Magnet N48 (4 Pack)
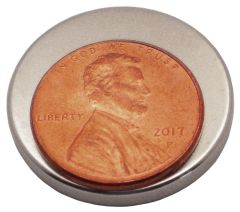
- 4 magnets
- Pull Force: 14.3 pounds per magnet
- SKU# M1X18DI
 $12.99 As low as $9.09
-
3/4 x 1/8 Inch Adhesive Backed Neodymium Disc Magnet N48 (10 Pack)
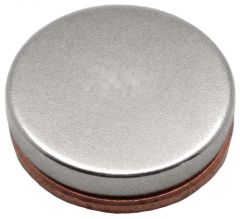
- 10 magnets
- Pull Force: 11.1 pounds per magnet
- SKU# M34X18ADH
$14.99 As low as $10.49 -
1/2 x 1/16 Inch Adhesive Backed Neodymium Disc Magnet N48 (20 Pack)
- 20 magnets
- Pull Force: 3.51 pounds per magnet
- SKU# M12X116ADH
$9.99 As low as $6.99