How to Make Saint Patrick’s Day Magnets
If you love DIY, magnets, and Saint Patrick’s Day, then you’re in luck. We have compiled a few DIY activities that you can do to celebrate this March 17th.
St. Patty’s Day- Bottle Cap Magnets
Adapted from MyCraftily Ever After
Supplies
- Bottle caps
- 1/2" x 1/16" adhesive-backed disc magnet
- 1” Circular hole punch or scissors
- Glue
- Mod Podge
Steps
- Layout all your bottle caps on a flat surface with the the concave part facing up.
- Cut out your St. Patty’s Day clip art into small circles about 1” in diameter.
- Place a drop of glue into the bottle caps and press in the circular cutouts.
- Allow the cutouts enough time to stick, usually about 2-3 minutes and coat them with a layer of Mod Podge.
- Wait for the Mod Podge to dry completely, then flip the bottle caps over and apply the adhesive magnets.
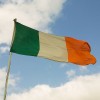
Irish Flag Felt Magnets
We were inspired by some St. Patty’s Day rainbows, pots of gold, and four leaf clovers felt magnets from She Knows. Here is how you can make Irish flag felt magnets:
Supplies
- Felt (green, white, & orange)
- 1/2" x 1/16" adhesive-backed disc magnet
- Pencil and paper
- Scissors
- Fabric glue
Steps
- Put a small, rectangular strip of white felt down first to serve as foundation. Then, glue the smaller green, white, and orange felt pieces on top of the larger rectangle in the pattern of the Irish Flag.
- Wait for the glue to dry and flip the felt piece over so the foundation is up.
- Remove the adhesive from the magnet and firmly press the sticky side down onto the felt.
- Wait a few seconds for the magnet to adhere and you have a magnetic Irish flag!