Magnet DIY: Magnetic Ice Sensory Activity
While school’s out for the summer, you can still make playtime educational (while staying fun) with this super easy magnetic DIY! The best part? Cleanup is easy — just wipe up water!
You’ll want to use plastic-coated magnets so that they don't corrode or rust while in the water.
We have multiple colors to choose from, so mix and match or choose your kid’s favorite! Choose from white, blue, black, orange, red, yellow, or green!
What You’ll Need:
- Plastic coated disc magnets of your choosing
- A mix of magnetic and non-magnetic materials like paper clips, screws, pipe cleaners, rubber balls, straws, etc.
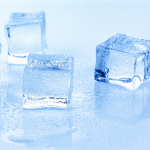
- Ice cube trays
- Water!
- Large popsicle sticks
- Optional: Crayons, paint, stickers, etc.
Steps:
- First, you’ll create your ice cubes! Just fill the ice cube trays (you can do this with one, but we recommend multiple to get more at one time!) about ¼ of the way. Add to the freezer for about 5 minutes. This way, your object won’t sink down to the bottom and easily be seen.
- Add your magnets and objects to the trays and fill the rest of the way up with water. Put in the freezer overnight.
- Here’s where you can add an optional portion — let your little ones decorate their “wands!” Let them paint color, draw, or add stickers to their popsicle sticks.
- Once decorated, create your “wand” by grabbing a large popsicle stick and gluing one of the plastic-coated magnets to the tip. Let this dry overnight as well!
- Next, pop out the ice cubes into a large baking dish — this will help keep the water in one place when the ice starts to melt!
- Now you can explain that some ice cubes will not be able to be picked up due to them having non-magnetic material inside of them. On the other hand, the ones with magnets and other magnetic materials WILL be picked up with the “wands.”