Defy Gravity With Your Own DIY Magnetic Plane

Whether you are looking for a fun activity to keep the gray away on these gloomy spring days or you are searching for the perfect homemade gift for grandpa, this DIY magnetic plane is a great way to bring the joy of learning to life! All you need is a few common household items and a bit of creativity to take to the skies.
Safety note: Neodymium magnets are not toys and are intended for adults 18 and older. Any project that uses neodymium magnets should be done only under the direct supervision of an adult, and the magnets should be kept away from young children and pets. If two or more magnets, or a magnet and a metal object, are swallowed, they can pull together through the intestinal walls and cause serious injury. Get emergency medical care right away if you suspect a magnet has been swallowed.
You Will Need
Gather the following supplies to make your airplane:- Cardboard
- Contact paper
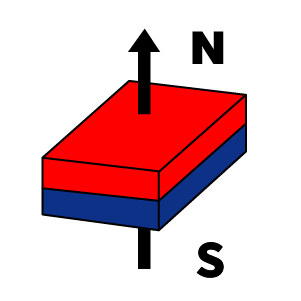
- Magnets (we recommend a 1/2" x 1/4" x 1/16" block magnet)
- String
- Thumb tacks (4x)
- Small airplane toy (or make your own with modeling clay or cardboard)
- Scissors
- Hot glue gun
- Pencil
Instructions
Here are eleven steps to build your airplane:- Cut out a square piece of cardboard (we recommend making your square about 10 inches both in length and width, but you may go as small as 7”x7”)
- Trace an outline of your pre-cut cardboard piece on your contact paper
- Place the contact paper overtop your cardboard (optional step for appearance only)
- Measure two pieces of string to fit diagonally on your cardboard (leaving enough string to tie a knot at each end and a bit of slack to account for when the magnet is suspended)
- Place the two pieces of string with one end at each corner, crossing them in the center of the cardboard
- Glue your first magnet to your string where the two pieces meet in the center
- Tie a knot at the end of each end of the string
- Place a thumb tack at each corner, securing the ends of each piece of string
- Place a small amount of glue on your second magnet and press it to the center of your cardboard base to align with your first magnet attached to the string
- Glue your plane to the top of the magnet
- Your magnets should self-align with your top magnet “suspended” overtop
Ignite Your Creativity With Magnets
With Apex Magnets the fun never stops! Discover an entire library of magnetic experiments, DIYs, facts, and much more when you visit our blog! Featuring new content every week, you will never run out of creativity to keep the magic of magnets going. Plus, when you subscribe to our free newsletter, you will receive even more magnetic ideas that may turn you into a magnetic enthusiast, just like our experts.
Related Products
-
1/2 x 1/4 x 1/16 Inch Neodymium Block Magnet N48 (20 Pack)

- 20 magnets
- Pull Force: 2.61 pounds per magnet
- SKU# M12x14x16BL
 $11.99 As low as $8.39
-
Pyrolytic Graphite Magnetic Levitation Kit

- Complete kit to demonstrate diamagnetic levitation.
- Includes (4) 1/2x1/2x1/4 Neodymium block magnets and (1) piece of 1cm x 1cm x 05.mm pyrolytic graphite.
- Pyrolytic graphite is a unique form of graphite produced by decomposition of a hydrocarbon gas, typically methane, at very high temperature in a vacuum furnace, resulting in an ultra-pure product near theoretical density and extremely anisotropic
- SKU# PGMLK
$39.99 -
1/2 x 1/2 x 1/16 Inch Adhesive Backed Neodymium Block Magnet N48 (20 Pack)

- 20 magnets
- Pull Force: 4.06 pounds per magnet
- SKU# M12X12x116BLADH
$12.99 As low as $9.09