Magnet Crafts and DIYs to Celebrate Hanukkah
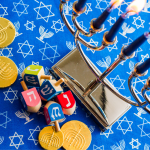
Hanukkah, also referenced as the Festival of Lights, is celebrated by families all over the world by lighting the menorah, preparing traditional foods, playing games, and giving gifts. It’s also celebrated by spending time with your loved ones, which is why we put together a few Hanukkah magnet crafts for you to create while spending the holiday with your family.
Popsicle Stick Star of David Magnet
Supplies:
- 6 popsicle sticks per star
- Any color paint and a paintbrush
- Washable glue
- 1/4" x 1/16" adhesive-backed disc magnet per star
Instructions:
- Paint the popsicle sticks any color and let dry.
- Glue three sticks together to form a triangle and repeat with the other three sticks.
- Place one triangle with a flat edge on the bottom and the point at the top, and flip the other triangle the opposite direction to form the Star of David.
- Glue the upside down triangle to the right side up triangle and let dry.
- Attach one disc magnet to the back of the star.
Magnetic Menorah Board
Supplies:
- 12” wooden board
- ½” wooden dowel rods, 8 trimmed to 4” and 1 trimmed to 6”
- Blue, white, and yellow acrylic paint
- Wood stain
- Sand paper
- Air dry clay
- 1/4" x 1/8" disc magnets
- 3mm x 2mm disc magnets
- Hot glue gun
- Hobby knife
Instructions:
- Sand your wooden board with the sandpaper. Make sure all rough edges are smooth.
- Stain the board with the color of your choice.
- While the board is drying, paint the trimmed wooden dowel rods. The shorter rods should be blue, and the taller rod should be white.
- Once the wood is stained and the dowel rods are painted, roll out the air dry clay on a flat, smooth surface. Using a hobby knife, such as an X-ACTO Knife, cut out nine flames for your candles.
- Let the board, rods, and clay flames all dry. We recommend letting the clay dry for 24 hours and then flipping the flames to dry an additional 24 hours.
- Once the clay is dry, paint each flame yellow.
- Using the hot glue gun, glue the flames to the top of each rod.
- On the backside of the board, measure and mark nine dots with equal distance in between each. The middle dot should be higher than the others. Press the 1/4" x 1/8" disc magnets into each dot of glue.
- In the middle of each rod, you’ll also glue a 3mm x 2mm disc magnet. This will be used to line up the magnets on the board with the magnetic “candles” displayed on the front of the board.
- On the first night of Hanukkah, place one of the shorter dowel rods on the first magnet to the right. Each night after, add a new “candle” until all eight candles, and the shamash candle, are all placed on the board.
Clay Hanukkah Fridge Magnets
Supplies:
- Air dry clay
- Acrylic paint in blue, yellow, black, and white
- Hanukkah cookie cutters
- 1/2" x 1/8"ceramic disc magnets
- Hot glue gun
- Baking sheet
- Parchment paper
- Mod Podge ® Gloss
- Rolling pin
Instructions:
- Roll out clay with your rolling pin, ensuring the clay is flat and doesn’t have any bubbles.
- Press cookie cutters into clay and remove excess clay around the imprints.
- Once you’ve “cut out” as many shapes as you’d like, transfer the clay pieces to a parchment paper-lined cookie sheet.
- Air dry the pieces for 24 hours on each side (two days total). Remember to flip them after the first 24 hours.
- After the clay pieces have dried, paint each one with acrylic paints. To seal them, finish with a layer of Mod Podge ® Gloss and let them dry completely.
- Use the hot glue gun to dab a pea-sized amount of glue on the back of each piece, then add a magnet and let it dry completely.