Two Easy and Interactive Fridge Magnet DIYs
Bored? Want to add some color and fun to your fridge while you wait for your food to microwave? Here are two unique magnet ideas that are easy to make using polymer clay and a few other supplies. Both magnets are interactive and can be great learning tools for little ones to teach them about moon cycles and shapes!
Phases of the Moon Magnets
What You’ll Need:
- Air dry polymer clay
- Black and gold acrylic paint — or, use Gold foil and adhesive
- Cookie cutter or palette knife
- Paint brush
- ¼” x 1/16” disc adhesive magnets — 1/magnets
- Spray varnish
Steps:
- Roll out clay to make circles around 5mm thick. To create the phases of the moon, you’ll need 7.
- Make slight indents in your clay circles with your cookie cutter for each phase. These indents will act as guides so you know where to paint and foil your clay.
- Once your clay has hardened, paint in the black parts of your circles with acrylic paint using your indents as a guide. Leave the ‘crescent moon’ parts white.
- When the paint is dry, apply adhesive to the ‘moon’ parts of your clay circles and then stick down some gold foil. The process for adhering the gold foil may vary between brands, so it’s best to follow the manufacturer’s instructions for this step.
- Remember to foil the sides of your circles as well as the top so no parts are left white.
- Attach magnets and let dry before hanging!
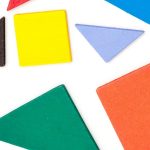
Tangrams
What You’ll Need:
- Air-dry clay
- Spray-paint or paint
- ¼” x 1/16” disc adhesive magnets
- Rolling pin or flat glass
- Knife or thin ruler
- Newspaper
- Scissors
Steps:
- Roll out your clay and use a tangram template to cut
- Paint them any way you’d like. We’d recommend at least 3 different colors.
- Stick adhesive magnets to the backs
- Head to tangram channel for challenging shapes